
Nina’s Sandwich Bread Recipe

INGREDIENTS
2 ¼ cups warm water
1 tablespoon + ⅜ teaspoon yeast
2 ¼ teaspoons salt
2 ¼ tablespoons canola oil
1/4 cup + 1 tablespoon sugar/honey
5-6 cups bread flour

Prep Time 3 hours with warm water; 6 hours with cold water
Cook Time 25 minutes
Total Time 5 hours
Difficulty Medium
Yield 12-18 servings
DIRECTIONS
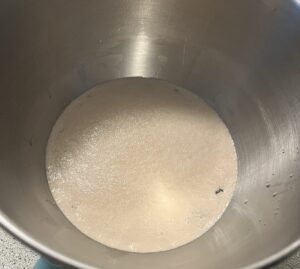
1. Pour the water into a large bowl, add a heavy pinch of sugar/honey. Mix to dissolve the sugar/honey and let it settle, then add the yeast.
You can use warm or cold water depending on how long you’re willing to wait for it to rise. Cold water will take double the time to rise, but it will have a richer, deeper flavor.
2. Cover with a towel and let it stand for 10 minutes. Once the yeast activates, it’ll foam up and look a little bubbly.
Some say that you should dump it if it’s not super foamy but I never do and it always works out—this is a very forgiving recipe and I’d rather not waste.
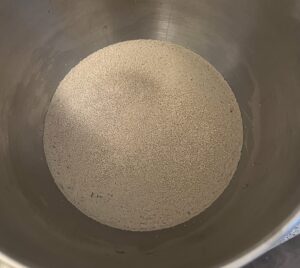
3. After it sits and the yeast activates, add 4 cups of the flour and all of the salt, oil, sugar/honey.
Make sure that the salt doesn’t touch the yeast — salt will inhibit yeast growth and reproduction so the flour acts as a barrier, letting the yeast activate and ferment as you begin to combine it.
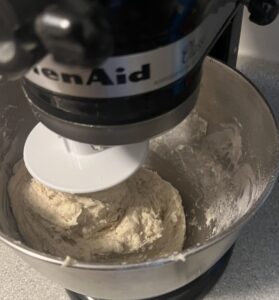
4. Mix with a spatula to combine or use a kitchen aid with the hook attachment at the lowest setting. Continue to mix until all ingredients have combined. This should last 3-5 minutes.
5. Pour in another cup of flour and continue to combine at the lowest setting. This time, it will look like a pretty well formed dough. It’ll kind of stick to the hook attachment as it rotates around the bowl, peeling all of the dough away from the bowl itself. Keep mixing in the kitchen aid until the dough starts smacking into the sides of the bowl, making it wobble. This should last 5-8 minutes.
6. Pour half a cup of flour on a clean surface, take the dough out of the bowl and place it on top of the flour with some more flour sprinkled on top of the dough.
Note that it will be very sticky at this point — use the flour to coat your hands and the dough so it doesn’t stick so much.
7. Begin kneading the dough and incorporating more of the flour as you go.
There will be a bit left over at the end; you can always put it back in the bag if it seems good. Sometimes I use all of the flour and other times there’s probably a ¼ cup left — it all depends on how the dough reacts that day.
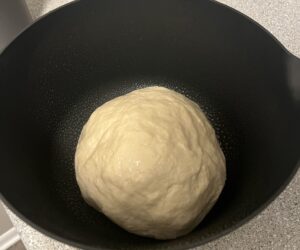
8. Knead the dough for about 10-15 minutes until it appears smooth and is a bit sticky but doesn’t actually stick to your finger if you pull away. When you press into it, it should bounce back almost completely.
If you used warm water in the beginning, kneading will take less time. If you used cold water, you will have to knead for longer. This is another reason that bread made with cold water is considered better — you have to work at it longer to activate the gluten from the yeast. The bread will be delicious either way, so if you don’t have the time, don’t feel bad. I do both ways depending on the day.
9. Butter a large bowl (I use Pam spray). You can use the same bowl from the kitchen aid if you’d prefer but make sure it’s cleaned out. Put your dough ball in and spray the dough with butter as well.
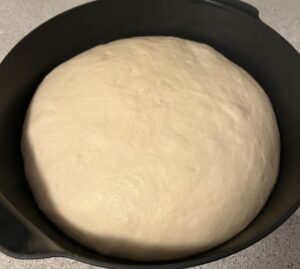
10. Cover with a towel and leave to proof somewhere warm until it has doubled in size. If you used warm water, this will take about 1 hour and 30 minutes. If you used cold water, it will take closer to 3 hours.
11. Once it has doubled in size, push down the dough or punch it, depending on your mood.
The goal is to get the air out.
12. Lay it on a flat, clean surface and cut the dough in half. Roll each piece into a log to fit a loaf pan.
I have found that cutting the dough before you roll it out keeps the loaves more even once they’re baked. You can pinch where the dough comes together and roll it more if it seems to be falling apart.
13. Butter two loaf pans. Place the two dough logs in the pans with that meeting point of where you rolled it at the bottom. Butter the tops of the loaves.
14. Cover the loaf pans with a towel and leave to proof in a warm place again. If you used warm water, this will take about 45 minutes. If you used cold water, this will take about 1 hour and 30 minutes.
15. After the rise, they should be in line with or above the top of the loaf pan.
16. Bake at 350°F for 25 minutes. The bake time is the same whether you used cold or warm water.
17. After, take them out of the pans and knock on the bottom of the loaves like you knock on a door but more gently (i.e. with your knuckles). They should sound hollow.
18. Let them cool completely and then store. You can keep one out to use and freeze the other or you can go ahead and have both.
Congratulations, you’ve just made bread!